How Do You Remove Dog Hair from Car Carpet and Seats
Remove mats first, loosen hair with rubber friction, vacuum in short strokes, and finish seat tracks with a crevice tool before reinstalling mats.
- Prepare the automotive carpet, cargo liners, fabric seats, floor mats, seat tracks, and trunk side panels before vacuuming so loose debris does not grind hair deeper.
- Use rubber pet hair stone or squeegee and keep the bin, bag, or filter clean before the first pass.
- Loosen packed fur with compact cordless vacuum in pet sleeping zones and traffic lanes.
- Vacuum slowly in overlapping lanes, then repeat from a second direction.
- Finish edges, furniture legs, corners, and transitions with detail tools.
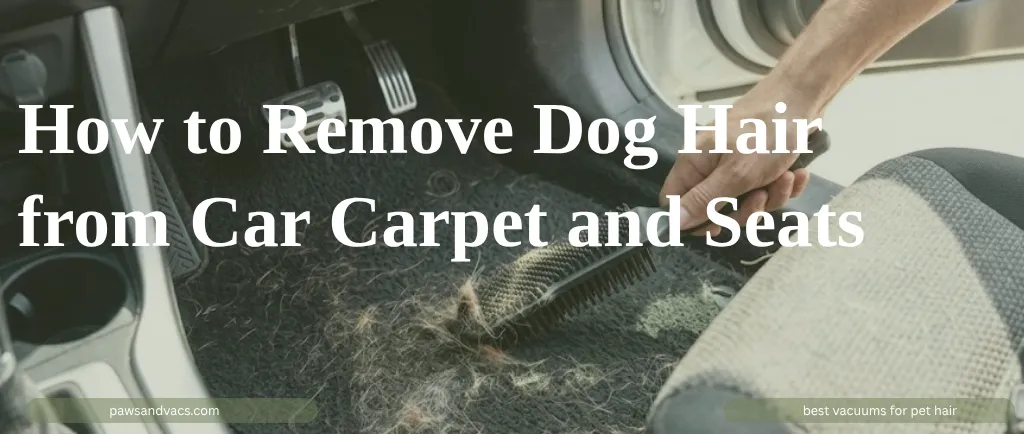
For the broader model-by-model rankings, see our guide to the best vacuum for pet hair in cars.
Why This Pet Hair Problem Happens
The reader wants an automotive cleaning process for embedded dog hair in cargo carpet, seat fabric, and tight crevices. The problem is not laziness or a dirty home. Pet hair behaves differently from ordinary dust because it is long, flexible, oily enough to cling, and light enough to move with the vacuum exhaust. On automotive carpet, cargo liners, fabric seats, floor mats, seat tracks, and trunk side panels, the strands can lie in the direction of the pile, hook into texture, or gather at edges where the main cleaner head loses contact.
The specific issue is short stiff dog hair that hooks into automotive carpet and long guard hair that mats around seat rails and cargo seams. Once hair is pressed into a surface, fast vacuuming only removes the loose top layer. The deeper layer needs the brush roll, rubber friction, or a motorized upholstery tool to break contact before suction can move it into the bin. That is why the same vacuum can look impressive on crumbs and still disappoint on fur.
Dander adds a second layer of difficulty. Hair is visible, but dander, pollen, skin flakes, and fine dust travel with it. A routine that removes only the obvious clumps may still leave allergen reservoirs behind in seams, baseboards, carpet backing, and the fabric channels pets use every day.
Tools and Settings That Work
Best Primary Tool
Use a rubber pet hair stone or squeegee because pet hair needs agitation and airflow working together. A passive suction-only nozzle may remove surface fuzz, but it rarely lifts hair that has wrapped around carpet yarns or fabric texture.
Best Prep Tool
A compact cordless vacuum gives the vacuum a head start by gathering static-clung hair into visible rows. Prep tools matter most in pet beds, nap zones, hallway lanes, and the first few feet inside exterior doors.
Detail Attachment
A powered mini brush is not optional in pet homes. Hair migrates into seams, wall edges, stair lips, seat tracks, and baseboard gaps where the main cleaner head cannot maintain a seal.
Airflow Reset
Start with a long crevice tool. Pet hair carries dander and dust that load filters quickly, and even a strong motor becomes weak when airflow is blocked by packed hair or fine debris.
Step-by-Step Cleaning Method
- Clear the area. Remove toys, loose bedding, food crumbs, and anything that could block the cleaner head or hide a fur mat.
- Reset airflow. Empty the bin or bag, check the filter, and cut hair from the brush roll before the first pass.
- Loosen the hair. Use rubber friction or light raking in the direction that gathers hair into clumps instead of scattering it.
- Vacuum slowly. Move at roughly half your normal speed so the brush roll has time to agitate and the suction path has time to carry hair away.
- Crosshatch the surface. Turn 90 degrees and repeat. Hair that resists one pile direction often releases from another.
- Detail the edges. Use a crevice or upholstery tool around baseboards, stairs, seams, furniture legs, and thresholds.
- Inspect and repeat selectively. Repeat only the zones where hair remains rather than overworking the entire surface.
How to Know the Method Worked
After the first pass, run your palm against the carpet grain; upright hairs should feel loose rather than bristly and anchored. This simple check matters because pet hair removal is easy to overestimate. A room can look clean from standing height while the carpet edge, upholstery seam, or bare-floor corner still holds enough hair to reappear as soon as the pet walks through.
Listen to the vacuum as you work. A rising motor pitch often means the airflow path is restricted. A rattling cleaner head may mean debris or hair is wrapped around the brush. Hair trails behind the head usually mean the bin is packed, the filter is loaded, or the tool is moving too fast.
Common Mistakes to Avoid
| Mistake | Why It Fails | Better Fix |
|---|---|---|
| Fast zigzag passes | Hair stays wrapped around fibers because the brush roll gets no dwell time. | Use slow overlapping lanes and repeat from another direction. |
| Starting with a half-full bin | Pet hair bridges across screens and restricts airflow early. | Empty before cleaning fur-heavy rooms. |
| Ignoring edges | Hair migrates to corners and transitions where floorheads lose suction. | Finish with a crevice or upholstery tool. |
| Using wet cleaning first | Moisture can mat hair into fibers and create odor. | Remove dry hair before any damp cleaning. |
When a Better Vacuum Matters
If car cleaning takes more than 30 minutes because the hose tool lacks agitation, choose a pet vacuum with a motorized mini tool and removable battery. The right upgrade is not always the most expensive model. Match the vacuum to the surface: strong brush agitation for carpet, soft controlled rollers for bare floors, powered mini tools for upholstery and cars, and sealed filtration when dander symptoms matter.
The main pillar page compares upright, cordless, canister, bagged, and bagless options by suction, bin capacity, HEPA filtration, pet tools, and anti-tangle design. Use it when technique is no longer the limiting factor and you need a better machine for the mess pattern in your home: best vacuum for pet hair in cars.
FAQ
What is the best way to handle short stiff dog hair that hooks into automotive carpet and long guard hair that mats around seat rails and cargo seams?
Loosen the hair first, then vacuum slowly in overlapping passes. Remove mats first, loosen hair with rubber friction, vacuum in short strokes, and finish seat tracks with a crevice tool before reinstalling mats.
Why does pet hair stay on automotive carpet, cargo liners, fabric seats, floor mats, seat tracks, and trunk side panels after vacuuming?
The usual cause is weak agitation, fast pass speed, a full bin, a clogged filter, or hair wrapped around the brush roll. Pet hair needs friction before suction can carry it away.
Should I use powder before vacuuming pet hair?
Use powders sparingly. A very light odor-control treatment can help in some cases, but too much powder clogs filters and leaves residue. Dry hair removal should come first.
When should I replace my vacuum instead of changing technique?
If car cleaning takes more than 30 minutes because the hose tool lacks agitation, choose a pet vacuum with a motorized mini tool and removable battery. At that point, the cleaner head, airflow path, or tool kit is probably mismatched to the pet mess.